Step 2 - Use a JavaScript script to control the application state
In the first section of this step you create another state manager to set which indicators are visible when the user switches the application on and off. In the second section of the step you add a JavaScript script to define when the application is switched on and off.
Create a state manager to switch the air conditioning application on and off
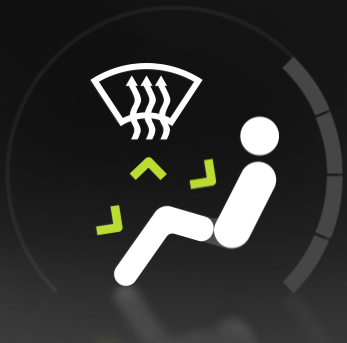
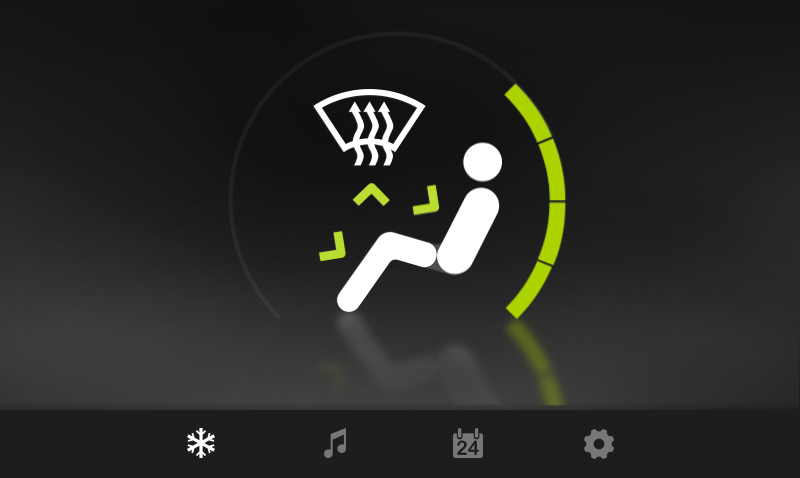
In this section you create a state manager that controls which indicators are visible when the application is switched on and off. You use images that show the air conditioning level indicators gray when the air conditioning is switched off and the first level indicator bar green when the air conditioning is switched on.
To create a state manager to switch the application on and off:
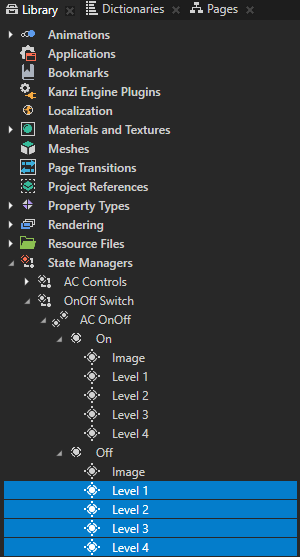
- In the Library > State Managers create a state manager, and name it OnOff Switch.
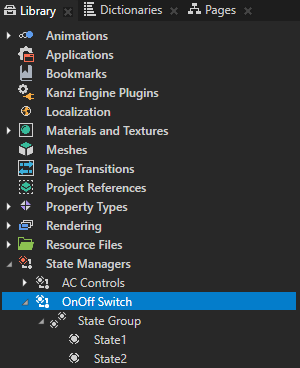
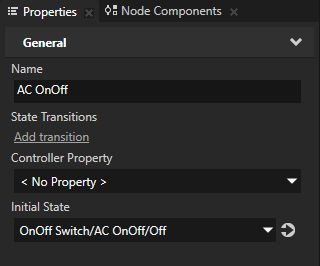
- In the OnOff Switch rename the state group to AC OnOff, and the two states On and Off.
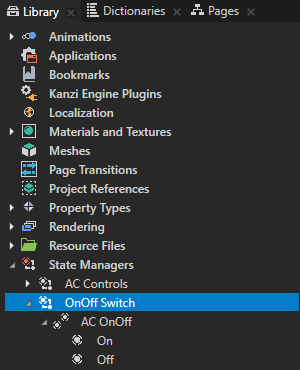
- In the Library > State Managers > OnOff Switch select the AC OnOff state group and in the Properties set the Initial State to OnOff Switch/AC OnOff/Off.
- In the On and Off states create a State Object for the image that the application displays when it is switched on and off.
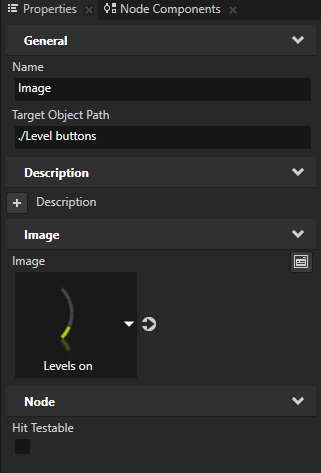
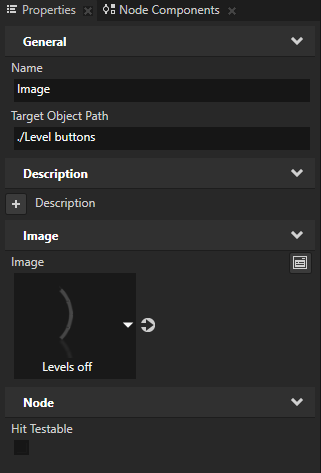
For example, name the state objects Image.
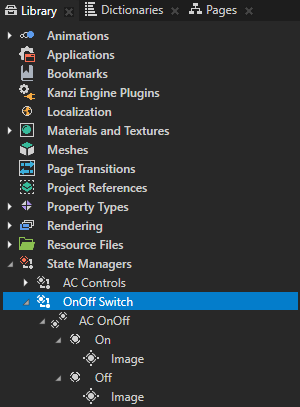
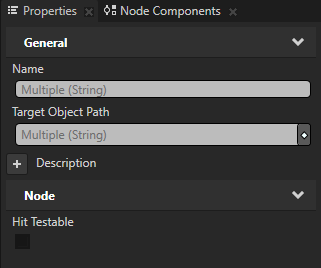
- Select the Image state objects and in the Properties add and set:
- Target Object Path to ./Level buttons
- Image to:
- Levels on for the On state
- Levels off for the Off state
- Hit Testable to disabled
The Levels on image contains the level indicator bars with the first bar visible, and the Levels off image displays the level indicator bars gray when the application is switched off. You set the state manager to display the correct image when the application is in the On and Off state.
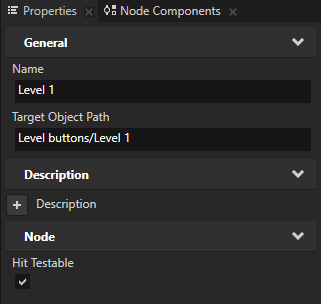
- In the On state create a State Object for each level, name them Level 1, Level 2, Level 3, and Level 4, and in the Properties:
- Set the Target Object Path for the Level 1 State Object to Level buttons/Level 1, for the Level 2 State Object to Level buttons/Level 2, and so on.
- Add the Hit Testable property for each State Object and make sure it is enabled.
You enable the Hit Testable property for the level indicators when the application is switched on to enable user input for the level buttons, and disable the hit testability when the application is switched off.
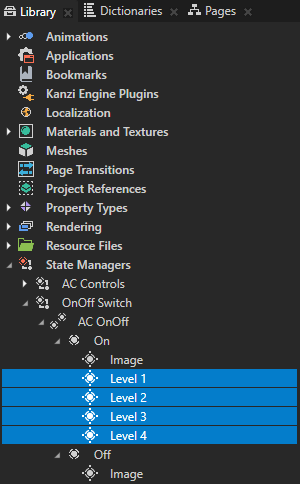
- In the Library select the Level 1, Level 2, Level 3, and Level 4 state objects, copy and paste them to the Off state, and in the Properties disable the Hit Testable property.
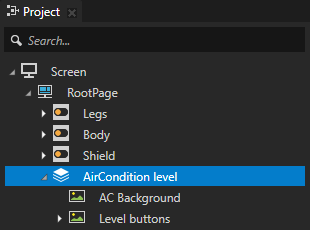
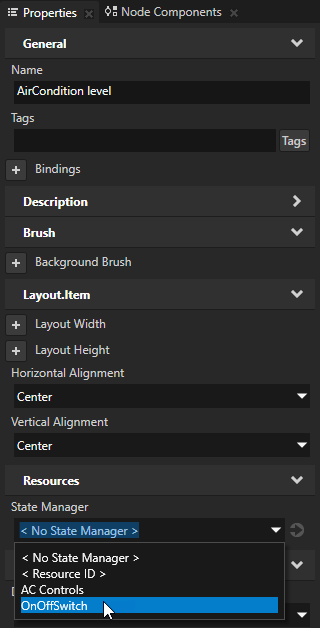
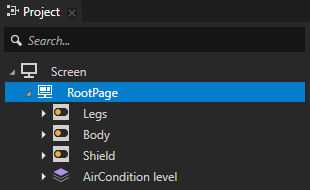
- In the Project select the AirCondition level node, in the Properties add the State Manager property, and set it to OnOff Switch.
You set the OnOff Switch state manager for the AirCondition level node to control the level buttons.
In the Preview clicking the indicator buttons switches them on. In the next section you add a JavaScript script to set the application to the Off state when all the indicator buttons are switched off.
In the Interact mode you can interact with your application in the Preview window as you would on a device. When you are using a Preview tool, to switch to the Interact mode, in the Preview window click  .
.
Use a JavaScript script to control the state managers
In this section you add a JavaScript script to the application to control the application state. You set the application to execute the script when the values of the Legs, Body, and Shield toggle buttons change.
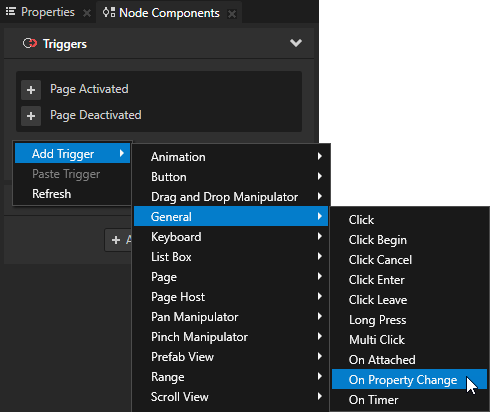
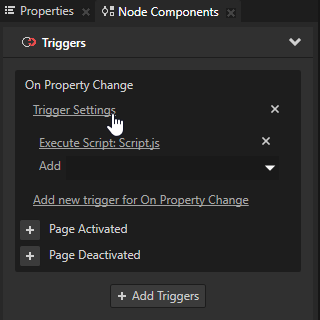
- In the Project select the RootPage node, in the Node Components in the Triggers section right-click, and select Add Trigger > General > On Property Change.
Kanzi executes the On Property Change trigger when the set property value changes.
- In the On Property Change trigger click the dropdown menu and select the Execute Script action.
When the On Property Change trigger is set off, Kanzi executes the script you select in the Script Editor.
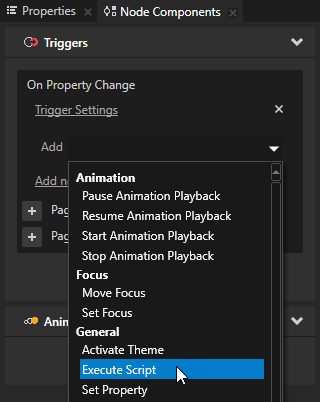
- In the Execute Script window select + Create Script to create a script.

- In the Script Editor write the script you want to use to control which indicators are visible when the application is switched on and off. See Scripting reference.
For example, use this script:// Get the toggle state of the Body, Legs, and Shield toggle buttons.
var shield = node.lookupNode('./Shield');
var shieldState = shield.getProperty('ButtonConcept.ToggleState');
var legs = node.lookupNode('./Legs');
var legsState = legs.getProperty('ButtonConcept.ToggleState');
var body = node.lookupNode('./Body');
var bodyState = body.getProperty('ButtonConcept.ToggleState');
var stack = node.lookupNode('./AirCondition level');
var levelButtons = node.lookupNode('./AirCondition level/Level buttons');
// Set the AC OnOff state to On when the Body, Legs, or Shield toggle button
// state is 1. If no button state is 1, set the state to Off and the level button
// state to Level 1.
if (shieldState != 0 || legsState != 0 || bodyState != 0)
{
stack.goToState('AC OnOff.On');
}
else
{
stack.goToState('AC OnOff.Off');
levelButtons.goToState('Level.1')
}
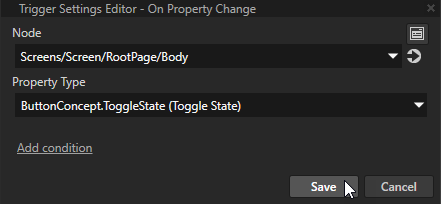
- In the Project select the RootPage node, in the Node Components in the On Property Change trigger click Trigger Settings, and in the Trigger Settings Editor set:
- Node to Screens/Screen/RootPage/Body
- Property Type to ButtonConcept.ToggleState (Toggle State)
Kanzi executes the script you created in the previous step when the user clicks the button, and changes the value of the Toggle State property.
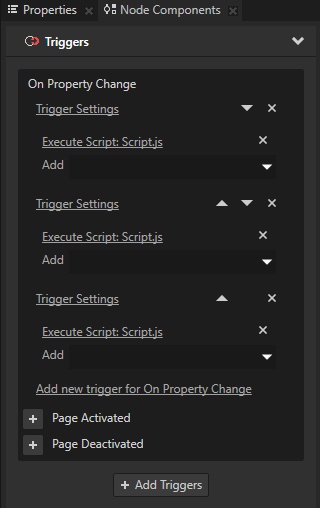
- Add two more triggers for On Property Change, from the first On Property Change trigger copy and paste the Execute Script action to each new trigger, and in the Trigger Settings Editor for those triggers set:
- Node to Screens/Screen/RootPage/Legs and Screens/Screen/RootPage/Shield
- Property Type to ButtonConcept.ToggleState (Toggle State)
You create a trigger for each of the Body, Legs, and Shield buttons. When a user clicks one of those buttons Kanzi executes the script, and the application checks the state of each indicator button. Clicking one of the buttons triggers the application to go to the On state. When all buttons are switched off, the application switches off also the level indicators.
In the Preview when you click any of the areas for which you want to switch on the air conditioning, the application is switched on. Once the application is switched on, you can change the level and switch on and off other areas. To switch the air conditioning off, switch off the Body, Shield, and Legs indicator buttons.
< PREVIOUS STEP
What's next?
In this tutorial you learned how to control your Kanzi application with state managers. You also learned how to use a JavaScript script to control a state manager. Now you can:
See also
State manager
Using scripts
Using state managers
Using state transitions

Open topic with navigation